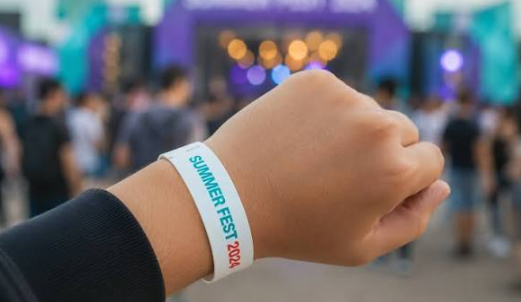
Printing wristbands in-house instead of ordering pre-printed batches from a promotional products vendor cuts per-unit cost and removes the 1-2 week turnaround that comes with outside printing. A direct thermal wristband printer handles Tyvek, vinyl, or polyester wristband stock on demand, so a 400-person festival or a daycare with daily check-in can print exactly what the headcount needs the morning of the event instead of guessing a quantity three weeks out. This guide covers picking the right printer, choosing stock, setting up a template, calibrating the machine, and printing a full run without jammed feeds or faded prints.
The process below applies whether the event is a single weekend festival, a recurring gym access system, or daily daycare pickup verification. The steps are the same: match the printer to continuous wristband stock, set up a repeatable template, calibrate once, then batch print. 2026 event organizers increasingly run this in-house because the hardware cost is recovered after a handful of events compared to outsourced printing.
What You’ll Need
- A direct thermal wristband printer (McAuley Labels builds models sized for continuous wristband media, not just cut-sheet labels)
- Wristband stock: Tyvek (single-use events), vinyl (multi-day, water-resistant), or polyester (reusable access passes)
- Label design software compatible with your printer (GoLabel or similar thermal label design tools)
- A laptop, desktop, or tablet to run the design file
- A USB cable or Wi-Fi connection for the printer
- Your attendee count or an estimated buffer (10-15% over headcount is standard for event wristbands)
Step 1: Choose a Printer Built for Continuous Wristband Stock
A standard 4×6 shipping label printer will not reliably feed wristband media because wristbands run on continuous rolls with die-cut perforations spaced differently than shipping labels. The printer needs a sensor that can read wristband gaps and a print head rated for the slightly thicker Tyvek or vinyl stock.
This is the step that determines whether the rest of the project goes smoothly. A printer mismatched to wristband media jams, skips perforations, or prints off-center on the band. McAuley Labels’ wristband printer line is built around this exact use case: feeding continuous wristband rolls without the gap-sensing errors that happen when a general-purpose label printer is forced into a job it wasn’t designed for. Venues running recurring access control, like gyms and water parks, need a wristband printer that can run daily batches without recalibrating every time. One-off event organizers need the same reliability for a single large run the morning of an event, when there’s no time to troubleshoot.
If the event is a water park or entertainment center with daily wristband turnover, look at options built for high-volume daily printing rather than occasional runs. McAuley Labels covers this with a dedicated wristband printer for water parks and entertainment centers setup, and a parallel option for corporate events and conferences where badge-style wristbands need sharper text for names and session access tiers.
Resolution matters here too: 203 DPI is fine for barcodes and large text, but if the wristband carries a small QR code for scan-in, 300 DPI prints a cleaner, more scannable code at the smaller size wristbands allow.
Common mistake: buying a printer rated for shipping labels and assuming it will handle wristband rolls. Check that the printer explicitly lists wristband media compatibility before ordering stock.
See also: How to Build a Sri Lanka Trip Around Kandy and Wildlife Experiences
Step 2: Pick the Right Wristband Material for Your Event
Material choice depends on how long the wristband needs to survive and whether it gets wet. Tyvek is the standard for single-day events — it’s tamper-evident (tears if removed) and inexpensive per unit. Vinyl holds up through multi-day festivals and pool or water park use since it resists tearing when wet. Polyester is the choice for reusable access passes, like gym membership wristbands that get scanned repeatedly over weeks.
Expected outcome: stock matched to event duration and exposure, so wristbands don’t tear or fade before the event ends.
Common mistake: ordering Tyvek for a multi-day outdoor festival. It tears easily once wet, and a torn wristband means a re-issue line at the gate.
Step 3: Set Up Your Wristband Template in Design Software
This step accomplishes the actual layout: event name, date, a sequential number or barcode, and any color coding for access tiers (VIP vs. general admission, for example).
In the design software, set the canvas width to match your wristband stock exactly — most wristband rolls run 3/4 inch or 1 inch wide. Add a text field for the event name, a barcode or QR field if you’re scanning wristbands at entry, and a sequential numbering field if you need to track issued counts. Save this as a template file so repeat events only require updating the date and count.
Expected outcome: a reusable template file that prints correctly aligned on the wristband width without text running off the edge.
Step 4: Connect and Calibrate the Printer
Before the full print run, connect the printer via USB or Wi-Fi and run a calibration pass. Calibration teaches the printer where the gaps between wristbands sit on the roll, which prevents prints from drifting off-center as the run continues.
For Wi-Fi setup specifically, most printers walk through Settings > Network > Wi-Fi Setup, then a test page confirms the connection before the design software can send jobs. If the printer supports it, a guide to connecting a label printer to Wi-Fi covers the general process, since the Wi-Fi handshake is largely the same across printer types.
Expected outcome: the printer feeds and stops at the correct position for each wristband, with no drift after 10+ consecutive prints.
Common mistake: skipping calibration after switching wristband stock types. Different materials and perforation spacing require recalibration, not just a reload.
Step 5: Print a Test Batch Before the Full Run
Print 5-10 wristbands before committing to the full order. Check barcode or QR scannability with an actual scanner, not just visual inspection, and check that text doesn’t bleed past the wristband edge.
Expected outcome: confirmation that the full batch will scan and read correctly before hundreds of wristbands are committed to stock.
Step 6: Batch Print the Full Wristband Order
Once the test batch scans clean, queue the full print job with a 10-15% buffer over expected headcount. Most wristband printers rated for continuous media can run several hundred units per hour without reloading, which matters when printing the morning of a same-day event.
Common mistake: printing the exact headcount with no buffer. Mis-scans, damaged wristbands, and last-minute registrations always eat into the count.
Step 7: Apply and Distribute Wristbands at Check-In
Assign check-in staff to apply wristbands rather than handing out the roll for self-application — this keeps the tamper-evident closure intact and prevents reuse. For scanned wristbands, confirm the scanner app or POS system is linked to the same database the wristband numbering or QR codes reference before doors open.
Troubleshooting Common Problems
Wristbands print blank or faded: check that the print density/darkness setting matches the stock — Tyvek and vinyl often need different darkness levels on the same printer.
Printer skips or double-feeds wristbands: recalibrate the gap sensor; this usually means the sensor lost its reference point after a stock change.
QR codes won’t scan: bump print resolution to 300 DPI if available, or enlarge the QR code field in the template — sub-half-inch QR codes at 203 DPI often fail to scan reliably.
Text runs off the wristband edge: the template canvas width doesn’t match actual stock width; re-measure the physical roll and adjust the template.
Printer won’t connect over Wi-Fi: confirm the printer and computer are on the same network band (2.4GHz vs 5GHz mismatches are the most common cause).
Tools and Resources
- McAuley Labels wristband printer — direct thermal printer built for continuous wristband media, suited to festivals, water parks, gyms, and daycare check-in systems
- Tyvek, vinyl, or polyester wristband stock — material choice depends on event duration and water exposure
- GoLabel or equivalent design software — for building and saving reusable wristband templates
- A handheld barcode or QR scanner — needed if wristbands control entry or re-entry at scanned checkpoints
For recurring access control rather than one-off events, a wristband printer for gyms and event access control setup handles daily reprints without the batch-sizing math a single event requires. Daycares and childcare facilities checking kids in and out daily have a similar recurring need, covered under wristband printer for daycare check-in and pickup security.
FAQ
Can a regular label printer print wristbands?
Not reliably. Standard label printers are built for die-cut or continuous paper labels, not the gap spacing and material thickness of wristband rolls. A printer built for wristband media handles the perforation sensing correctly.
What’s the cheapest wristband material for a one-day event?
Tyvek is the standard low-cost option for single-day use since it’s thinner and tears if someone tries to remove and reuse it.
Does McAuley Labels sell a wristband printer for multi-day festivals?
Yes — McAuley Labels’ wristband printer options cover both single-day Tyvek runs and the higher-durability vinyl stock multi-day festivals need, including the wristband printer for festivals and concert venues setup.
How many wristbands can be printed per hour?
This depends on the specific printer model and print darkness setting; check the printer’s rated throughput before planning a same-day print run for a large headcount.
Do wristbands need a barcode or QR code?
Only if entry is being scanned electronically. Simple sequential numbering is enough for manual visual check-in; a scanned QR or barcode is needed for automated access systems or re-entry tracking.
Can the same printer handle both wristbands and other event materials, like badges?
Some printers switch between wristband rolls and standard label stock with a media change, but check the specific printer’s supported width range before assuming both will run on one machine.
Conclusion
In-house wristband printing comes down to four decisions: a printer built for continuous wristband media, stock matched to event duration and water exposure, a calibrated template, and a buffer over headcount before the full print run. A dedicated wristband printer, like the models McAuley Labels builds for water parks, festivals, gyms, and daycare check-in, removes the lead time and minimum-order problems that come with outsourcing wristbands to a promotional products vendor. Running this in-house in 2026 means wristbands get printed same-day, re-prints for lost or damaged bands are instant, and the hardware cost is spread across every event run afterward instead of paying a per-order markup each time.